
Can you say Bargello?
I was asked by members of my guild to teach a Bargello class. I haven’t made a Bargello quilt in years, so I had to brush up on the technique.
Traditional Bargello quilts imitate bargello needlepoint embroidery in their design. Multiple strips of fabric are sewn together, then cross-cut to create new strips sets of different widths. Those strip sections are laid out either up or down from the previous section to create a curving or flaming effect.
My very first pieced quilt was a Bargello. I know, pretty ambitious, but I didn’t know any better. Up to that point I had been making simple, small, fused applique wallhangings. This would be my first pieced quilt and my first large quilt. Considering my inexperience, the final product wasn’t too bad.
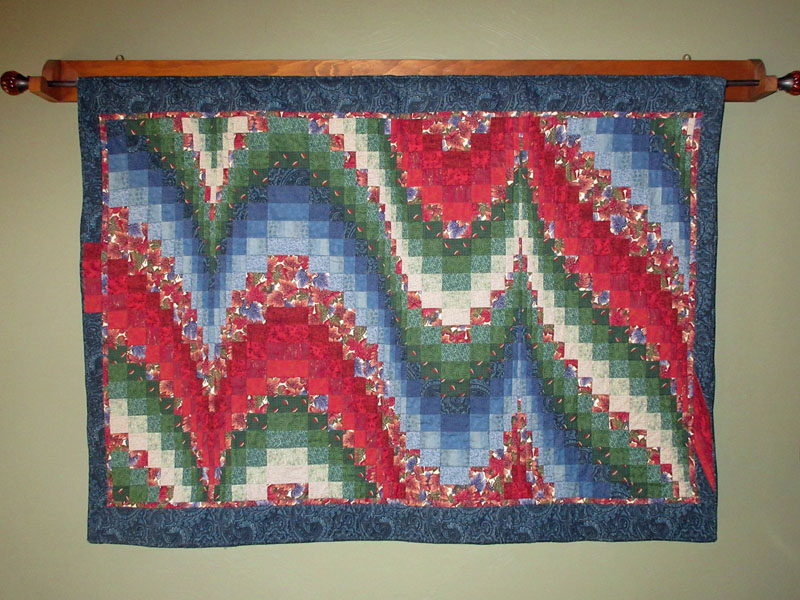
Yes, it’s very wrinkly and a little wonky, but most of the seam intersections match. I’m pretty proud of that!
I made this quilt in 1998, when we didn’t have the wide variety of fabrics we do now. It was difficult to find 18 fabrics that worked together in gradations of color and value. The red and blue runs worked, but the green gradation faded out to beige. Oh well.
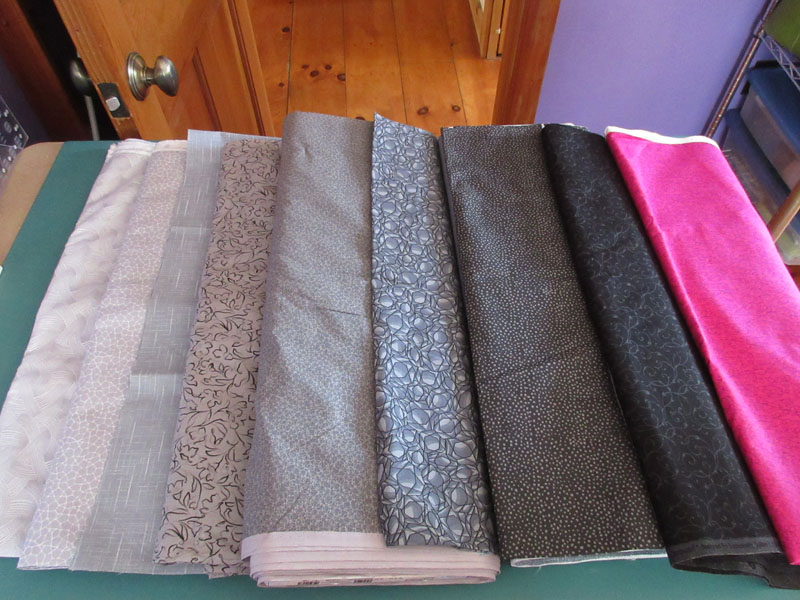
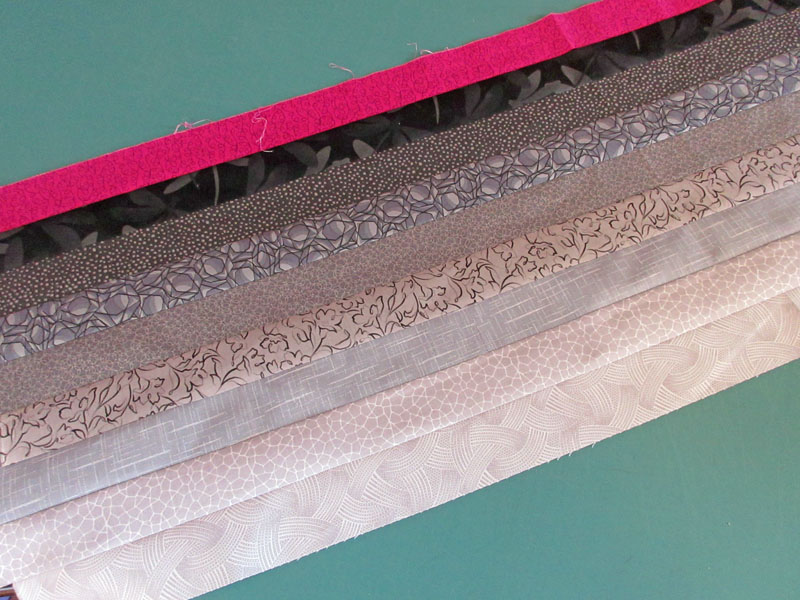
With that in mind, I chose to keep my class as basic and simple as possible. The students have a choice of making placemats or a table runner with only 9 different fabrics in one or two colorways. I decided to make my samples with one colorway, gray, and just a pop of color.
I’ve been collecting grays for a while and had them in my stash. I pulled eight grays and added a hot pink.
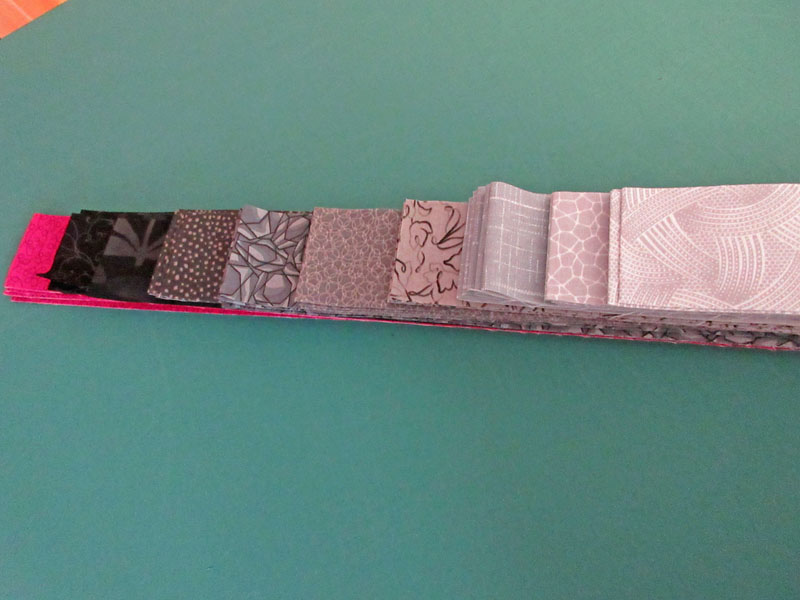
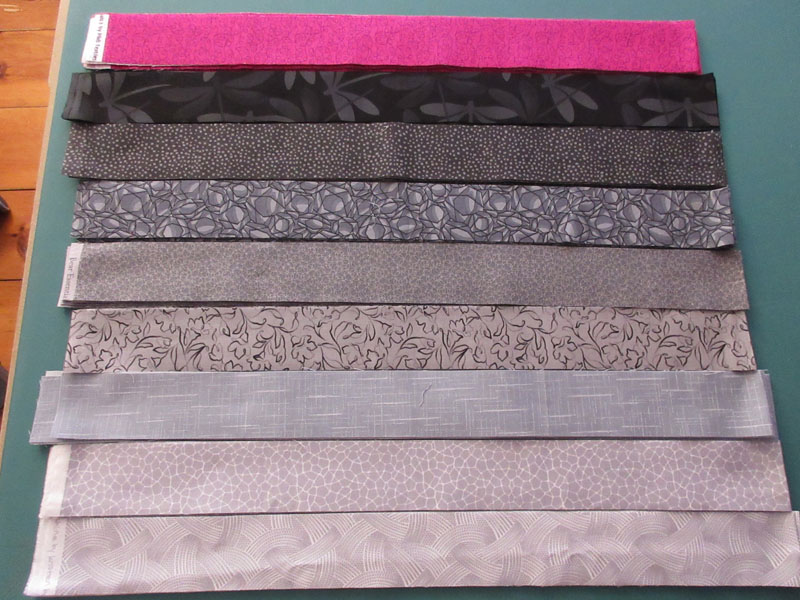
Cutting 2-inch strips from each fabric, I laid them out to check the gradation. I also took a black-and-white photo to make sure the strips were in the proper order to create the gradation.

When sewing lots of strips together, you need to be careful to keep the strips straight. That means careful sewing and careful pressing to prevent the strip set from getting wonky. (Remember my wonky quilt at the top?)
Then I sewed the first strip to the last strip to make a tube.
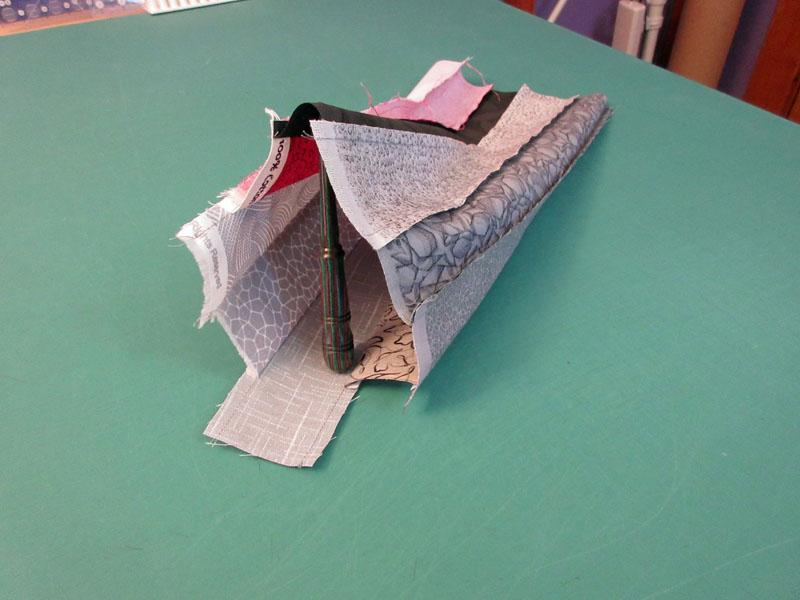
I sub-cut across the tube in different widths to get various subsections.

In creating the wave, I used a seam ripper to take out just one seam in the tube strip to create different straight strips. Then I laid them out to create the wave.

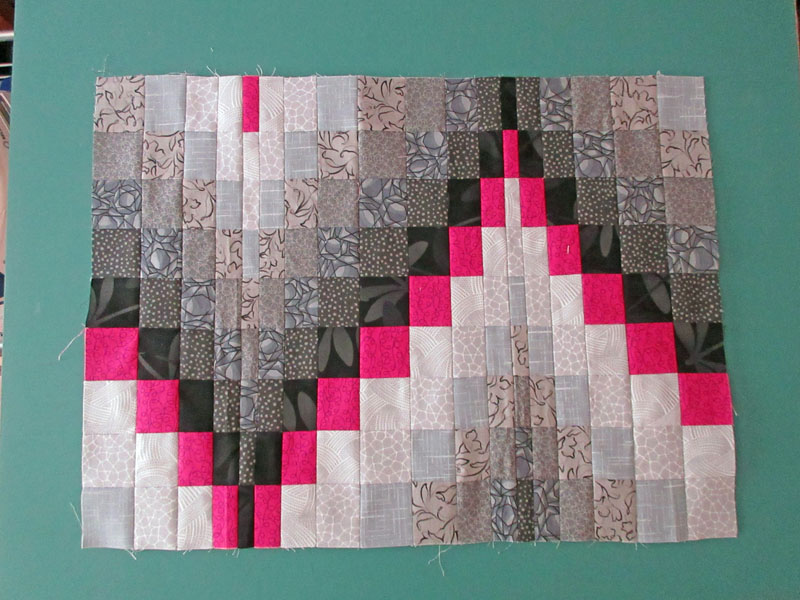
In this version, I am matching seams, so lots of pinning is done before each seam is sewn. And here’s the final version.
I’m looking forward to this new class. I can’t wait to see what my students come up with!
Until next week,
![]()
Follow Me on Social Media!